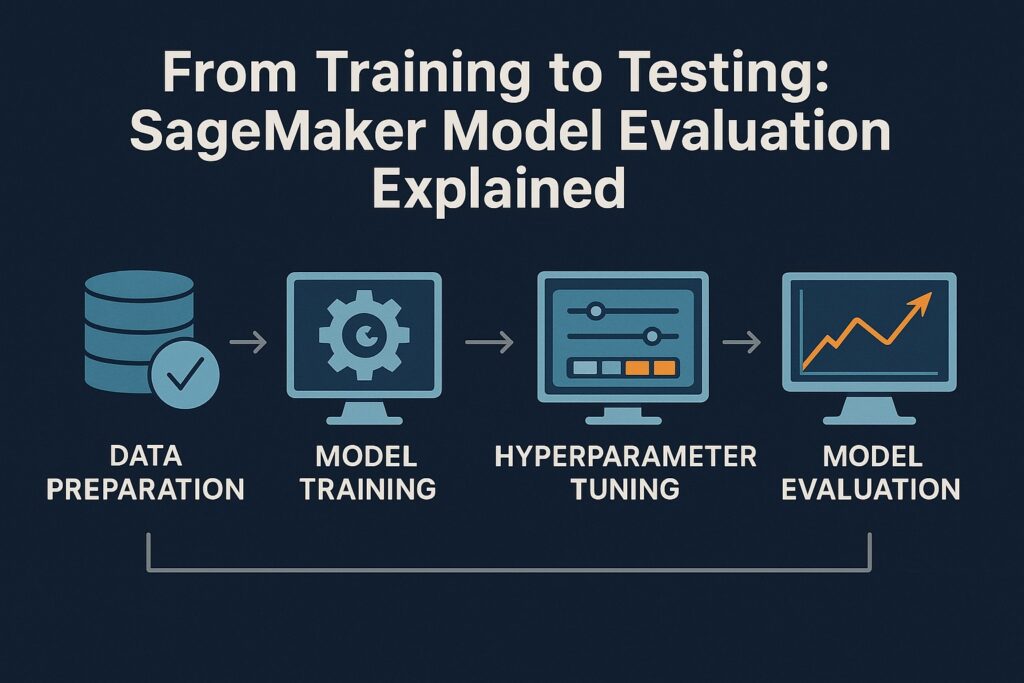
Introduction
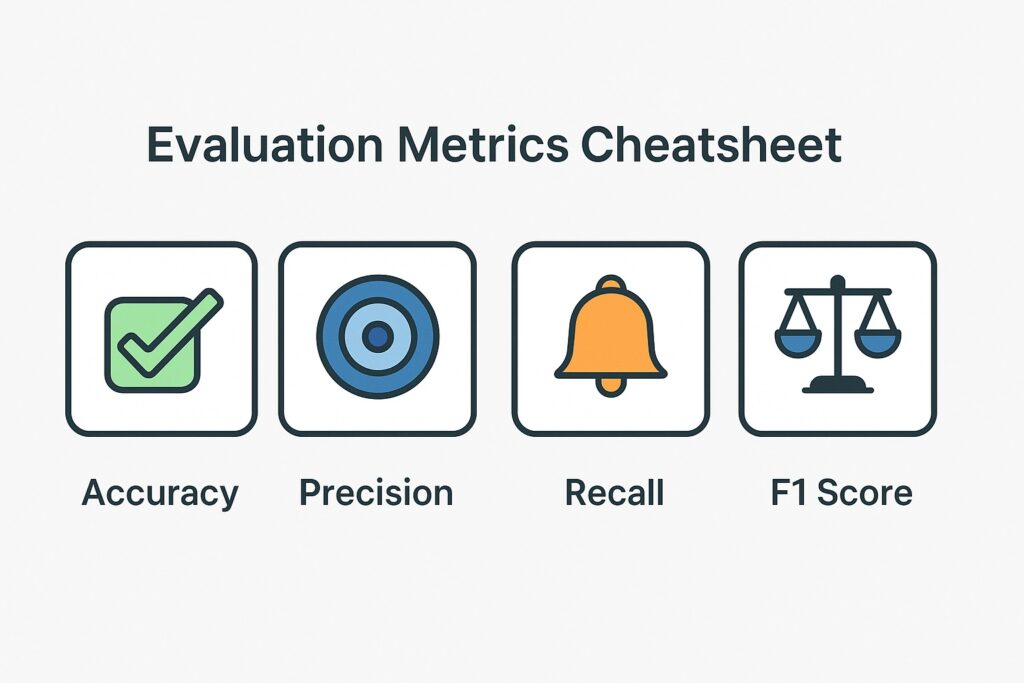
SageMaker model evaluation measures how well a predictive engine can infer data previously unseen. Unseen data contrasts with the data used to train the ML system, indicating an algorithm’s ability to generalize beyond the training dataset. Therefore, it is a vital stage in the model development lifecycle and typically follows after ML system training and hyperparameter tuning. As discussed previously, common evaluation metrics include accuracy, precision, recall, F1 score, and ROC-AUC. Model evaluation is crucial because it guides decisions regarding deployment, retraining, or further optimization.
Equally critical are the other stages of the model development lifecycle, including training and tuning. Therefore, this guide will walk you through the complete model development process using SageMaker, not just model evaluation. Specifically, it will teach you to train, tune, and evaluate ML workflows using a unified AWS workflow. Additionally, it will point out the practical SageMaker tools to apply at each stage.
Understanding SageMaker Model Evaluation
Training an ML system does not guarantee it will perform as well with predicting data outside the training set. Subsequently, we must test the predictive engine with data it has not previously seen to evaluate its performance. We quantify its predictive quality using objective metrics, such as accuracy or F1 score. Therefore, we assess the ML system’s generalization, which is how well it applies its learning beyond the training set. Hence, effective SageMaker model evaluation enables us to decide whether a model is ready for deployment or needs further refinement.
Accuracy measures the overall percentage of correct predictions made by the ML system for model evaluation with Sagemaker. However, whenever data is imbalanced or specific outputs have more negative consequences than others, then accuracy is an inappropriate measure. Whenever we want to minimize false alarms then we use precision, which measures how many predicted positives are correct. Otherwise, when we want to minimize false negatives, we use recall, which captures how many actual positives the model successfully identifies. Additionally, when we have unbalanced data then we consider balancing precision and recall using the F1 score. However, when we want to evaluate performance across all classification thresholds then we use ROC-AUC.
It is critical to guarantee that the model performs reliably on real-world data and not just on training data sets. Therefore, model evaluation prevents costly mistakes by validating that the system meets accuracy and fairness standards before deployment.
Model evaluation involves using SageMaker’s built-in tools to test, monitor, and compare the performance of prediction engines at scale.
Step 1 – Preparing Data for SageMaker Training
To ensure effective model evaluation with SageMaker then we need both training and evaluation data to be of high quality. Raw data gathered from the real world often contains missing values, duplicates, or inconsistent formatting. Additionally, it may include features that add noise or negatively impact prediction accuracy. Therefore, without preprocessing, raw data can lead to biased or unreliable model predictions.
To minimize these issues, data preparation is the first stage of the machine learning model development lifecycle. An earlier post provided a more detailed description of data preprocessing. Data preparation involves data cleaning, which removes missing values, duplicates, and formatting inconsistencies. Another crucial activity is feature engineering, which transforms raw inputs into meaningful variables for the model. A simple example is converting a date column into separate features, such as day, month, and year. Data normalization is an additional data preprocessing activity that ensures all features have consistent input ranges, thereby ensuring training stability and accuracy.
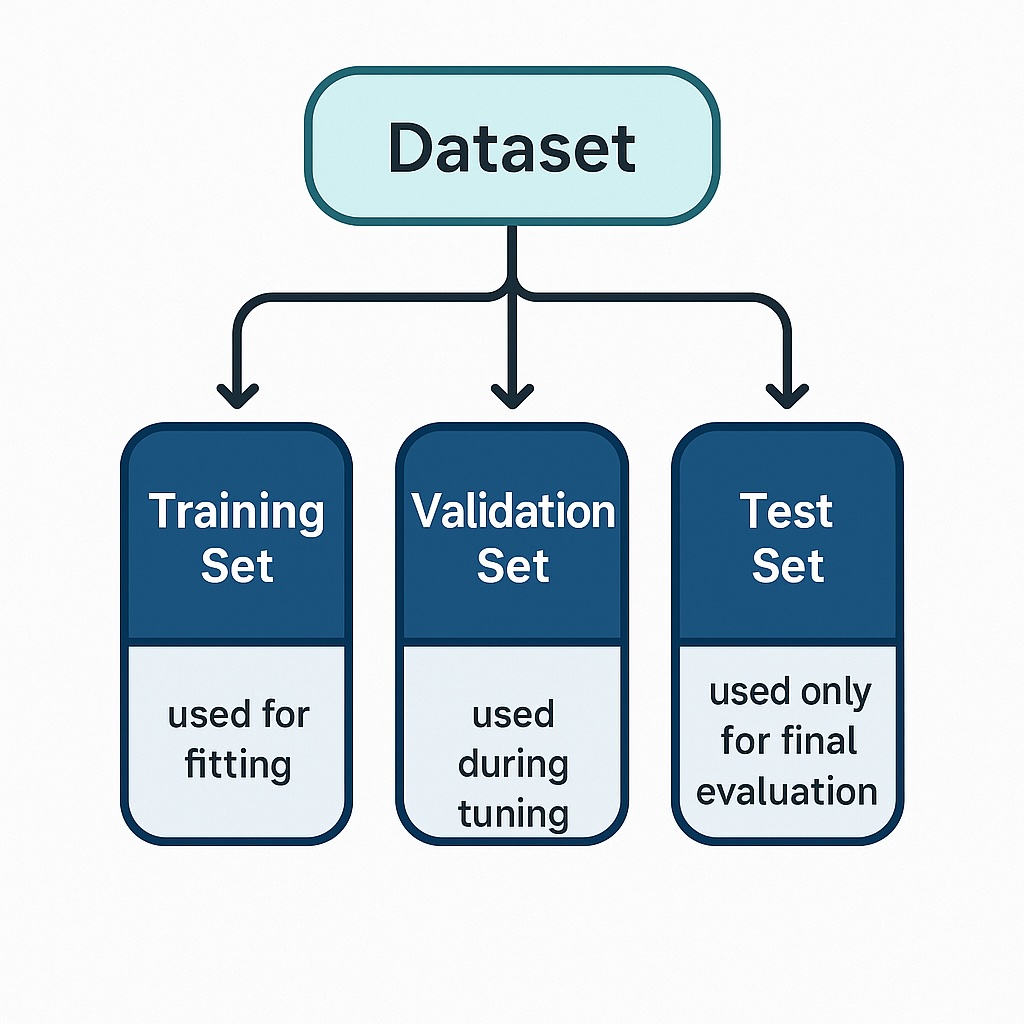
Data splitting is typically the final step in data preparation and is necessary to perform SageMaker model evaluation. It separates the dataset into training, validation, and test sets, thereby allowing generalization and model evaluation.
Overall data preprocessing ensures reproducibility by ensuring consistent data preparation and storage. It applies the same preprocessing logic, feature engineering steps, and data splits. This ensures that the same machine learning results are consistently recreated using the same data, code, and settings.
Amazon services support data preprocessing where S3 stores training, validation, and test data in a scalable and accessible format. Correspondingly, SageMaker processing enables running data cleaning and feature engineering jobs at scale. Finally, AWS Glue is optionally available for data cataloging and ETL workflows prior to training.
Step 2 – SageMaker Model Training Workflow
We perform SageMaker model training prior to evaluation, utilizing SageMaker Estimators that are high-level abstractions of the SageMaker Python SDK. Specifically, these simplify the process of configuring and launching machine training jobs on AWS. SageMaker Estimators therefore provide a high-level interface to configure and launch training jobs. Furthermore, they enable engineers to use built-in algorithms, such as XGBoost, linear learners, or image classification, without writing custom code. Whenever engineers set up custom models, Estimators support their own customized training scripts running on Docker images. Engineers are free to specify their own input data source, output locations, and computing resources.
Additionally, Estimators allow engineers to define hyperparameters and objective metrics for tracking performance. Another essential advantage of using SageMaker is that it handles infrastructure provisioning, scaling, and teardown automatically. Estimators also enable engineers to monitor training jobs in real-time using CloudWatch or SageMaker Studio. Subsequently, SageMaker Estimators make it easy to integrate training into pipelines, experiments, or automation workflows.
Engineers using SageMaker will also want to log metrics for subsequent model evaluation. Therefore, SageMaker allows engineers to define metric names and regular expressions to extract them from training logs. SageMaker sends these metrics automatically to Amazon CloudWatch for real-time monitoring and analysis. Furthermore, engineers can use SageMaker Studio to visualize accuracy or loss while training runs. Subsequently, engineers can use logged metrics to help them compare model performance across training jobs and tuning experiments.
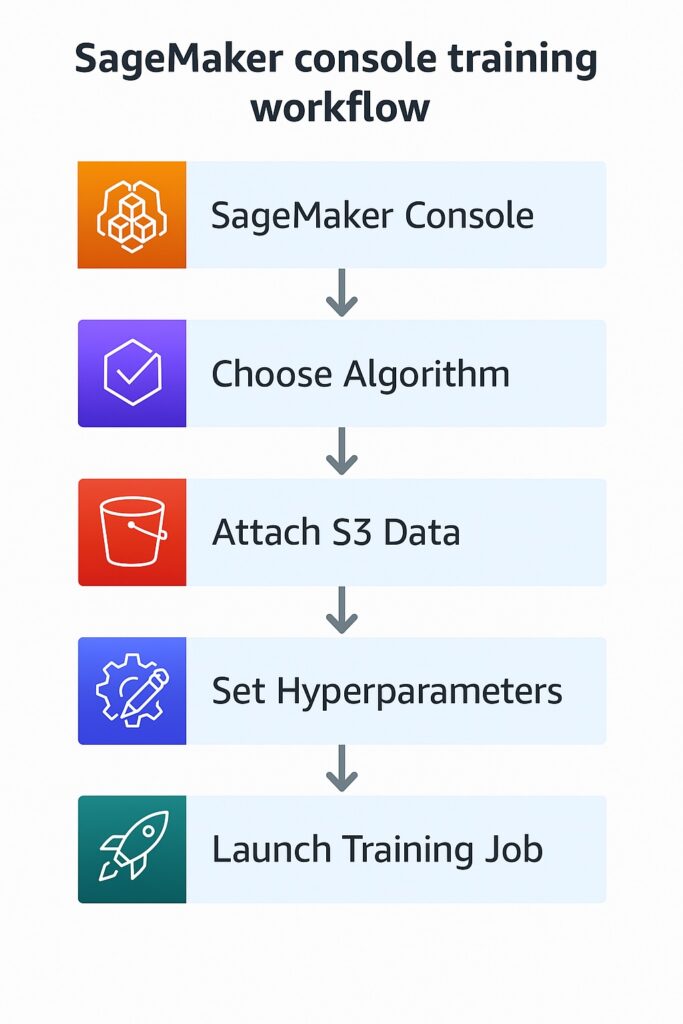
Engineers can create SageMaker model training jobs through the SageMaker Console without writing any code, as shown in the illustration below. Specifically, the distinct steps include selecting an algorithm, attaching input data from S3, configuring resources, and launching the job. This is an ideal approach for beginners or teams exploring SageMaker without the need to write any code.
Step 3 – Hyperparameter Model Tuning with SageMaker – Evaluation Preparation
Many machine learning algorithms comprise hyperparameters, which are configurable settings that control how an algorithm learns from data. These hyperparameters are never learned by the model but are set prior to training. Selecting the right hyperparameters can significantly improve accuracy, generalization, and stability. Conversely, selecting less optimal hyperparameters can result in underfitting, overfitting, or slow training. Therefore, hyperparameter tuning with SageMaker is the process that finds the optimal combination of these hyperparameters. A simple example is the maximum depth for a decision tree, which specifies the tree’s complexity. Whenever it is too shallow, it misses patterns; otherwise, when it is too deep, it memorizes noise.
Automated Hyperparameter Tuning
Manual hyperparameter tuning is cumbersome and error-prone, and SageMaker Tuning Jobs automates much of the manual hyperparameter tuning process. Subsequently, this saves time and reduces guesswork and associated errors. There are several inputs that the engineer provides for automated hyperparameter tuning. Firstly, there is the objective metric, such as validation accuracy or loss, which SageMaker aims to maximize or minimize.
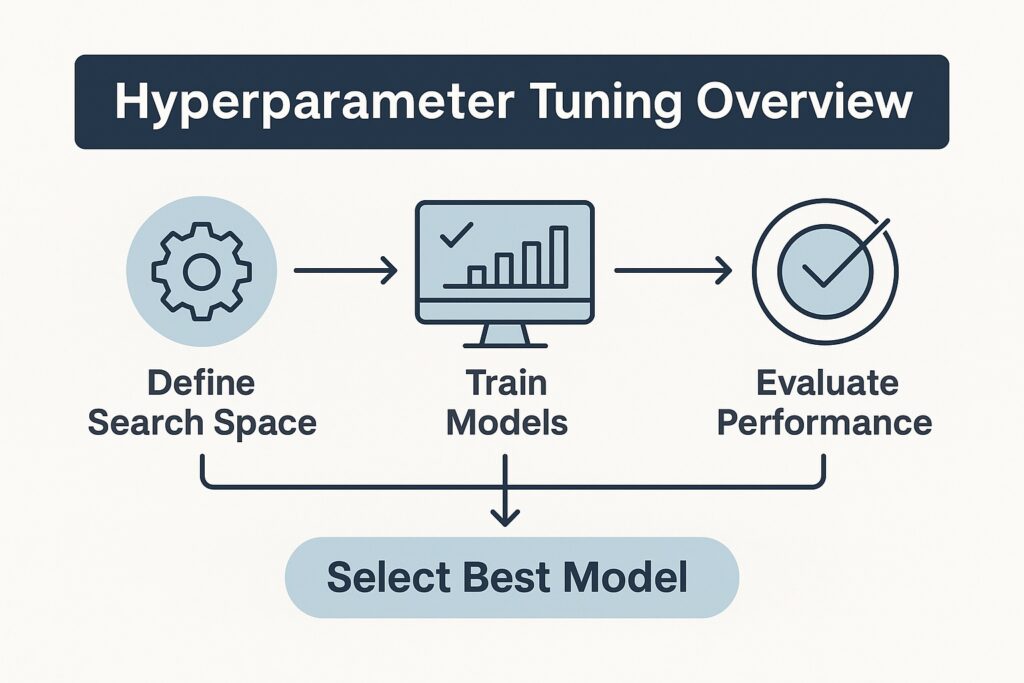
Next are the search ranges, which specify the minimum and maximum values for each hyperparameter that SageMaker can explore. Finally, the engineer selects the tuning strategy from a set of options, including random search and Bayesian optimization. Correspondingly, to accelerate the tuning process, SageMaker supports parallel training jobs, enabling faster hyperparameter tuning across multiple configurations.
Whenever training multiple models, engineers should choose the model that performs best on their primary evaluation metric. These include the F1 score or ROC-AUC. Therefore, they let SageMaker automatically rank models based on the chosen metric and return the top-performing candidate. Specifically, Sagemaker utilizes the validation set results to guide model performance. However, engineers should ensure that the test set is never used here, as it is needed for evaluating model performance.
This concludes the model selection process based on validation results—final evaluation on the test set is addressed in the next step.
Step 4 – SageMaker Model Performance Evaluation
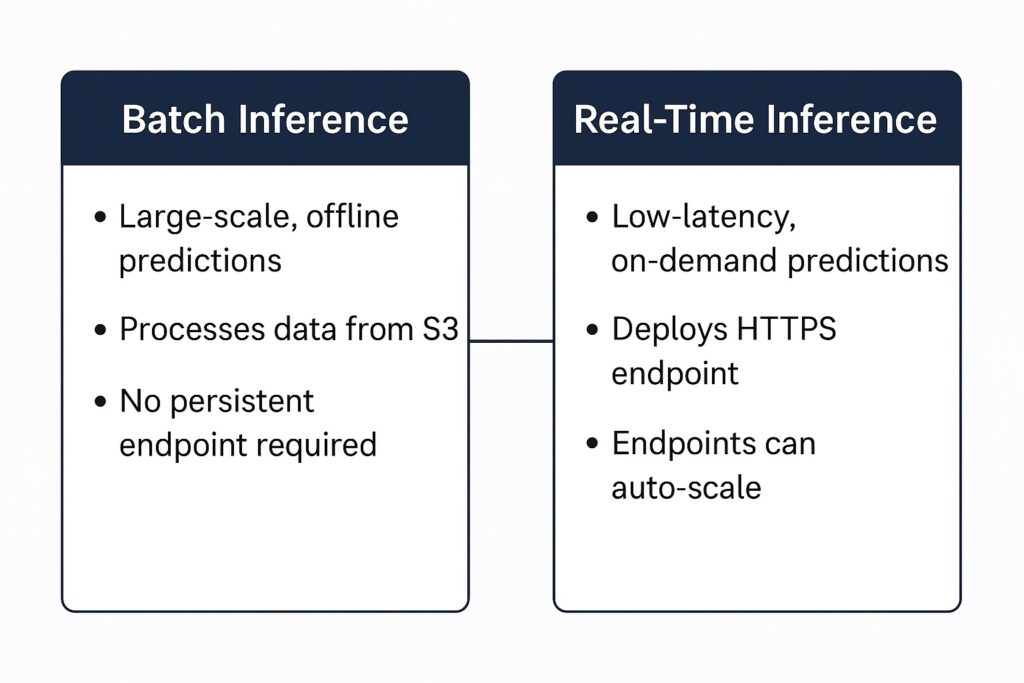
While the validation dataset was used in the machine learning step, the test dataset is used in SageMaker model evaluation. Specifically, the model performs inference on the test set to assess its performance on entirely unseen data. Particularly, SageMaker supports two primary inference methods: batch transform and real-time endpoint prediction.
Batch Transform
Batch transforms are ideal whenever predictions are large-scale and offline, and latency is not a concern. When run on SageMaker, they process data from S3 and write their predictions back to S3. Additionally, they do not require deploying a persistent endpoint, reducing the cost for occasional inference.
Real-time Endpoint Prediction
Conversely, real-time endpoint prediction is needed for low-latency and on-demand predictions. Specifically, this involves deploying the inference engine to an HTTPS endpoint that remains live during use. Additionally, endpoints can scale automatically based on traffic and performance requirements.
Selecting Evaluation Methods
Generally, both methods support pre-processing and post-processing scripts using inference pipelines. Therefore, choosing the right inference methods depends on use-case factors such as response time, data volume, and cost.
Interpreting SageMaker Model Evaluation
The task of SageMaker model evaluation truly begins once the predictive engine has performed inference on the test dataset. It is particularly critical to interpret the results and not just report them. Notably, Python libraries such as scikit-learn or pandas are available for comparing predictions to actual labels. Using these libraries enables us to calculate common metrics, such as accuracy, precision, recall, and F1 score, with just a few lines of code.
Additionally, these libraries offer visualization capabilities, allowing us to understand the results intuitively. Firstly, confusion matrices enable us to visualize model errors and identify false positives and negatives. Meanwhile, plotting ROC and precision-recall curves enables us to access classification thresholds and model trade-offs.
Engineers can also store evaluation metrics in SageMaker Experiments or CloudWatch to monitor performance trends over time.
Step 5 – Visualizing and Tracking SageMaker Evaluation Results
Previously mentioned, visualization allows an intuitive understanding of results, and there are several visualization tools. These include SageMaker Experiments, Model Monitor, and TensorBoard.
SageMaker Experiments help engineers track, organize, and compare multiple training and evaluation runs. Specifically, engineers can log metrics, parameters, and artifacts in Experiments to analyze model performance over time.
Meanwhile, engineers often need to detect data drift and quality issues in deployed models. Therefore, they can use SageMaker Model Monitor using automated baseline comparisons. SageMaker Model Monitor generates reports and alerts whenever live input data deviates from expected patterns.
Another framework is TensorBoard, which engineers can integrate with SageMaker. TensorBoard allows engineers to visualize training progress, loss curves, and other custom scalers.
Common visualizations that either TensorBoard or SageMaker Studio Notebooks can plot include ROC curve, confusion matrix, and metric history. SageMaker Experiments can also plot metric history, but only for logged metric values. ROC curves help engineers visualize trade-offs between true positive and false positive rates. Meanwhile, confusion matrices help to identify where the model makes correct or incorrect predictions. However, track metric history across runs monitors improvements or detects regressions in model performance.
When tracking across multiple runs for analysis and reproducibility then use SageMaker Experiments to organize and compare training runs systematically. It is also necessary to store metadata, parameters, and metrics for each run to ensure detailed analysis. Additionally, engineers should maintain consistent preprocessing and evaluation scripts to ensure reproducible results.
Best Practices for SageMaker Model Evaluation
Certain best practices improve the efficacy of model evaluation using SageMaker, which we will explore here. The primary core best practice is matching metrics to business goals such as revenue growth, cost reduction, or risk mitigation. An example of cost reduction is managing fraud detection, where false positives incur high costs; therefore, engineers should prioritize precision. There are several examples of risk mitigation, including disease diagnosis or loan default prediction. In these examples, missing true cases will harm the business, and recall is a better-suited metric for model evaluation. Whenever both false positives and false negatives impact overall business performance, the F1 score is more appropriate.
Another best practice is good data management to prevent data leakage and overfitting. Specifically, engineers should keep test data strictly separate from training and validation sets to avoid accidental leakage. Often, engineers need to perform cross-validation and therefore must take steps to prevent overfitting from occurring. Specifically, when cross-validation reuses data across folds, overly complex models may still overfit by memorizing patterns across those shared splits. Another best practice is that engineers should avoid including future or outcome-related features that are not available in real-world prediction. Finally, complex models can memorize noise in training data, and engineers should regularize them.
Automated model evaluation is preferred for consistent and repeatable analysis by scripting metric calculations and visualizations. Additionally, engineers should place these scripts and configurations under source control (e.g., Git) to track changes effectively. Additionally, results should be placed under version control. For textual results, use Git, but for images, use a binary version control like Artefactory.
Conclusion and Next Steps
This blog post explored how SageMaker performs model evaluation using unseen test data to measure generalization. Specifically, it demonstrated how training, tuning, and inference workflows feed into accurate performance assessment. Additionally, it considered evaluation methods like batch transform and real-time endpoints. Also, it highlighted the importance of interpreting model behavior through metrics such as accuracy, precision, recall, F1 score, and ROC-AUC. Finally, this article articulated crucial best practices for tracking, visualization, and aligning evaluation with business goals.
However, the reader needs to gain hands-on knowledge of the model development lifecycle. Therefore, the reader should apply the SageMaker workflow to a real-world dataset such as credit card fraud detection or customer churn. Firstly, they should perform preprocessing on the raw dataset, handling missing values and engineering relevant features. Next, they need to train and tune their models using SageMaker Estimators and Tuning Jobs for optimal performance. They then evaluate the model using a separate test set and visualize the results using a confusion matrix and ROC curves. Finally, they must track metrics across multiple runs using SageMaker Experiments to ensure consistency and reproducibility.
Stay tuned for future posts diving deeper into SageMaker workflows.
Further Reading
Learn Amazon SageMaker: A Guide to Building, Training, and Deploying Machine Learning Models (2nd Edition by Julien Simon)
Covers end-to-end SageMaker workflows, including preprocessing, estimation, tuning, deployment, monitoring, and Pipelines.
Machine Learning with Amazon SageMaker Cookbook by Joshua Arvin Lat (Packt Publishing)
Features 80 practical recipes to explore SageMaker capabilities—from data prep to tuning, model evaluation, and deployment.
Machine Learning for Business: Using Amazon SageMaker and Jupyter by Doug Hudgeon & Richard Nichol
Focused on real-world business scenarios—customer churn, fraud detection, forecasting—using SageMaker for applied ML pipelines.
Designing Machine Learning Systems by Chip Huyen
Though not SageMaker-specific, it thoroughly covers reproducibility, tracking, validation, and system design.
Affiliate Disclosure
This post contains affiliate links to books on Amazon. If you click on a link and make a purchase, AI Cloud Data Pulse may earn a small commission—at no additional cost to you. These recommendations are selected based on their relevance and usefulness to readers exploring SageMaker model development and evaluation.